
Searching for “antigravity ide extension” often mixes up three things: the Antigravity extension for VS Code, Antigravity IDE, and Antigravity CLI. They connect, but they are not the same installation path.
Dicas7 min
How to install the Antigravity extension in VS Code
Learn how to install the official Antigravity extension in VS Code, confirm the prerequisites and test your first agent safely.

Marcelo Santiago
Criador do bridgecode
The biggest AI newsletter in the World
Get AI articles in your inbox
Technical curation on models, agents and coding tools. No spam, unsubscribe anytime.
In this tutorial, you install the official Antigravity extension in VS Code, confirm your eligible account, and run your first test without confusing the extension with the IDE or the terminal.
In this article you will see:
- What the extension adds to VS Code.
- Which prerequisites to check before installation.
- How to install via the interface or VS Code command.
- How to sign in, test a task, and troubleshoot common issues.
What is the Antigravity extension for VS Code
The extension brings Google's agentic capabilities into VS Code. The official documentation describes a dedicated panel for chatting with agents, reviewing code diffs, and tracking multi step tasks.
This is different from Antigravity IDE, which is a standalone environment, and Antigravity CLI, which runs in the terminal. The extension is the path for those who want to stay in VS Code and add the Antigravity workflow to the editor they already use.
The installation can also set up the local component agy. For that reason, do not start by downloading files from unofficial sources or mixing instructions from older versions. First install the extension published by Google and follow the flow it presents.
For a broader view of the platform, see the article Google Antigravity: is the agent platform worth it?.
Check the Antigravity prerequisites
You need Visual Studio Code installed and an account with Antigravity entitlement. Current documentation also lists Gemini Enterprise among the access requirements, so confirm your account eligibility before troubleshooting an installation error.
The requirement is service access, not operating system. Google's extensions page describes the VS Code extension as compatible with macOS, Linux and Windows.
Use an open VS Code window in a test project. If the folder comes from someone else or a downloaded repository, keep Workspace Trust in restricted mode until you understand what actions the agent can perform.
Install the extension in VS Code
Open VS Code and follow these steps:
- Open the Extensions tab with
Ctrl+Shift+Xon Windows or Linux, orCmd+Shift+Xon macOS. - Search for
Google Antigravity. - Confirm that the displayed publisher is
Google. - Click Install.
- Look for the Antigravity icon in the Activity Bar.
The official extension page on Visual Studio Marketplace lists the identifier used by VS Code. If you prefer to install from the terminal, use:
Terminal
code --install-extension Google.google-antigravityThe command installs the package by the Marketplace identifier. Do not swap the publisher for a similar name and do not use a VSIX file found on a third party site.
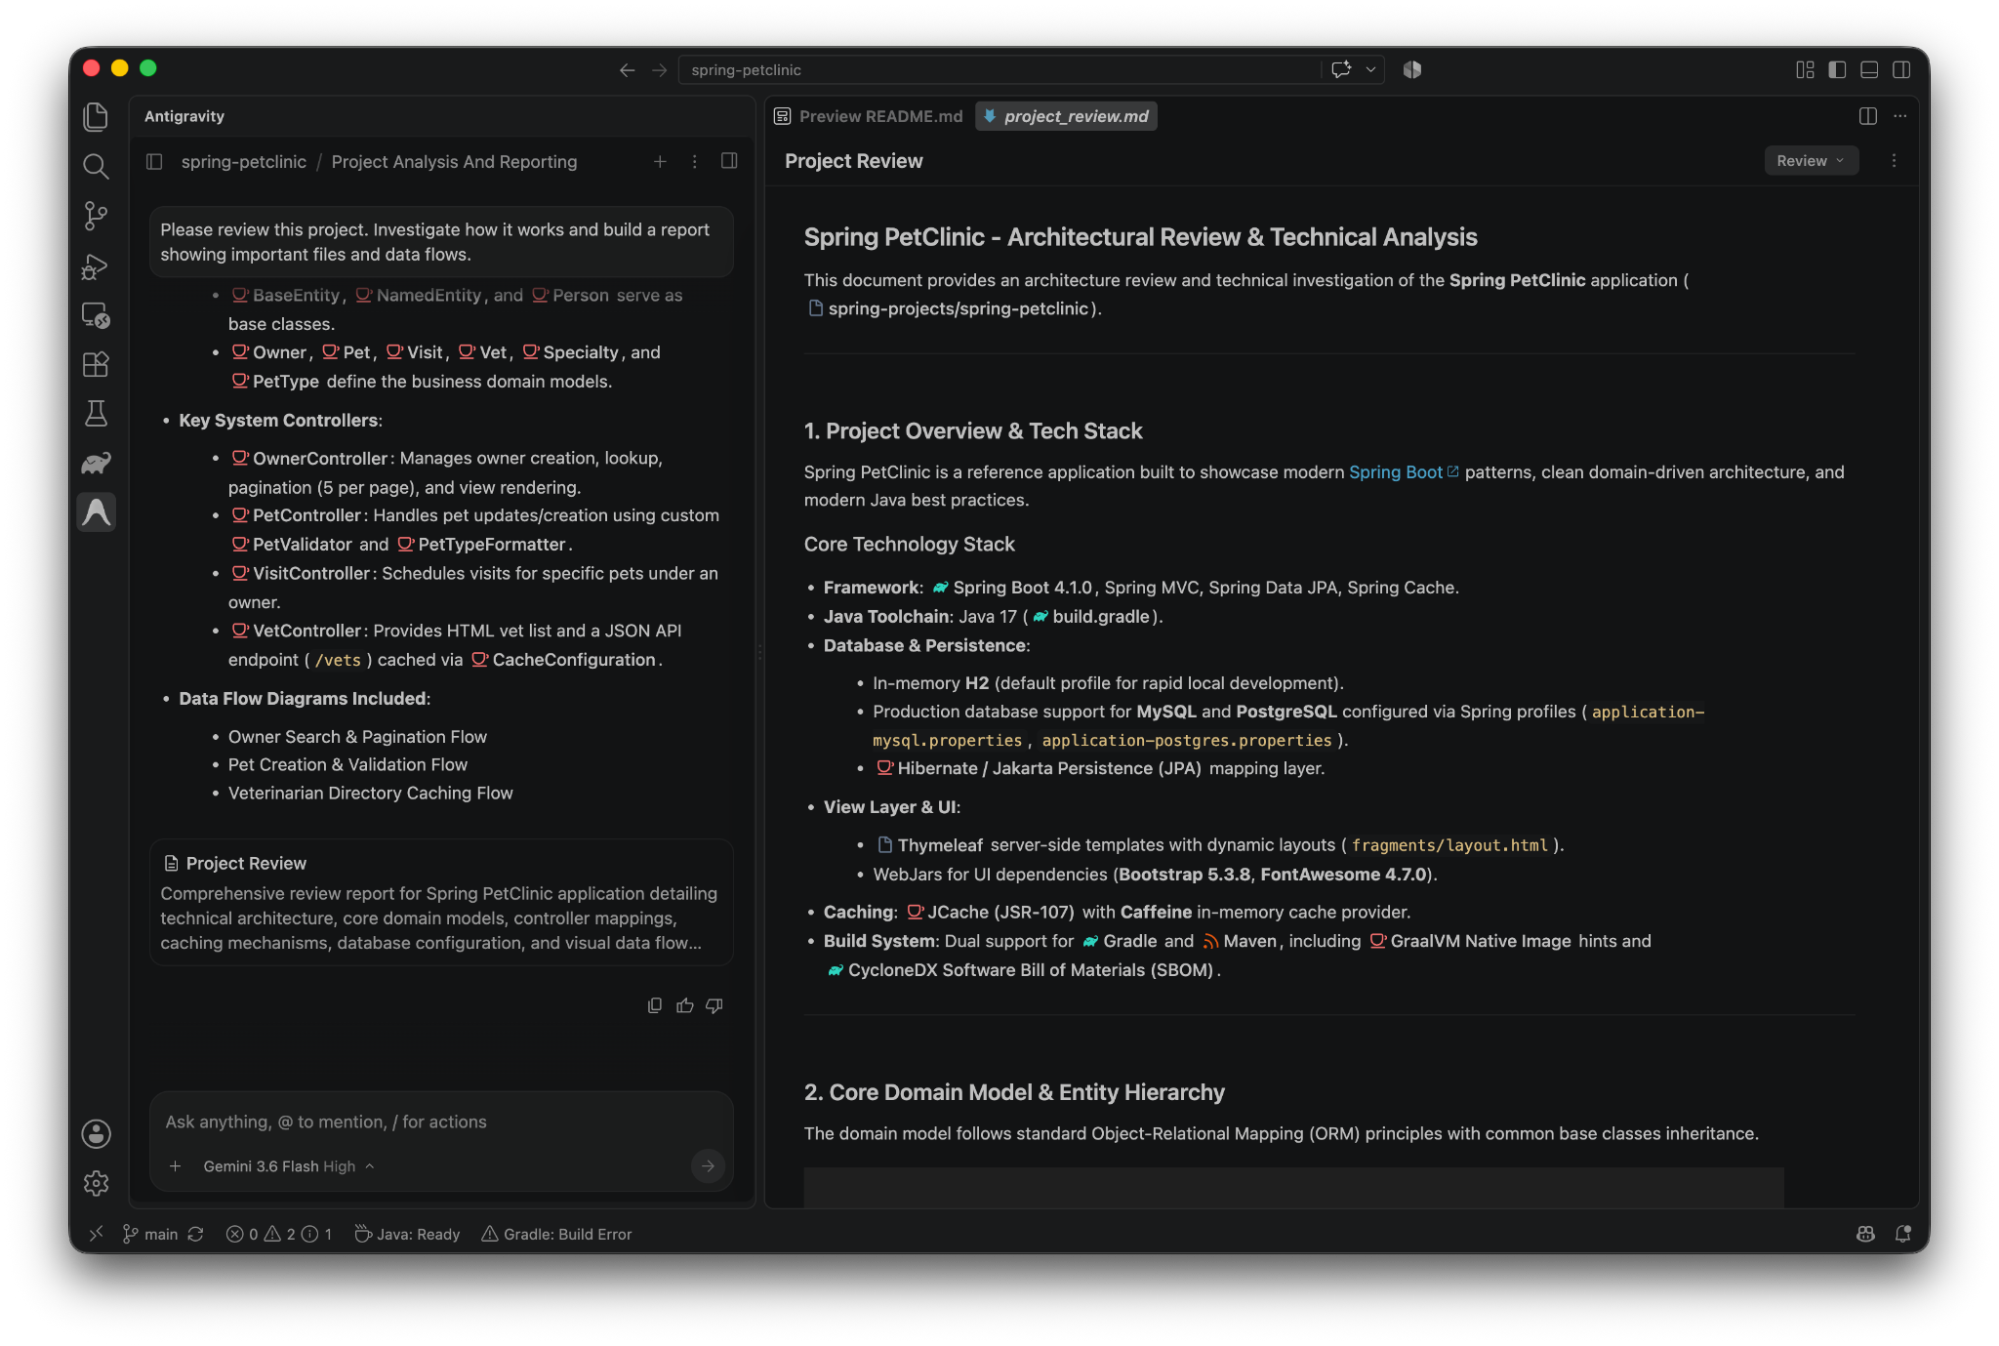
Google's own documentation recommends installing the extension from the Marketplace. The visual flow is useful because it lets you check the publisher, description and origin before confirming.
Log in and start the first task
After installation, click the Antigravity icon in the Activity Bar. The panel should guide you through login and initial setup. Authentication is unified across Antigravity surfaces, but the available features still depend on your account and its associated permissions.
Start with a read and planning request, not a big change. For example: “analyze src/, list the entry points and propose a small improvement; do not change files yet”.
Read the plan before allowing tools. Then ask for a small change in a test file and review the inline diff. Run the project tests manually before accepting the change.
The goal of the first test is to confirm three things: the agent can read the correct workspace, you understand when a tool will be used, and the result appears as a reviewable change in the editor.
Check scope before expanding use
Agents can receive workspace context and perform authorized actions. Before using a real repository, remove sensitive files from the test, review environment variables, and confirm which tools the panel offers.
Do not confuse “the agent saw the file” with “the agent can publish the change”. Keep Git clean, review git diff and run tests before committing or opening a pull request.
If you already work with multiple agents inside VS Code, the guide to agents in VS Code 1.145 helps organize sessions and pending changes. The Antigravity extension does not eliminate the need for human review.
If the extension does not appear or start
If search does not show Google Antigravity, check that VS Code is up to date and that you are using the official Marketplace. If the publisher is not Google, stop the installation and validate the source.
If the icon appears but login does not proceed, the first point is account eligibility. Review the entitlement and associated organization instead of trying parallel installs.
If installation finishes but the project does not load, confirm the open folder and Workspace Trust status. For additional integrations, consult the guide to MCP in VS Code and enable only servers whose origin you know.
When to combine Antigravity with bridgecode
The Antigravity extension solves agent access inside VS Code. bridgecode solves another layer: tracking multiple agents, separating roles, and organizing a planning, execution and review flow.
If the task is a question or a small change, start with Antigravity alone. If different specialists are working in parallel, coordinate your agents in a single flow in bridgecode and keep each step reviewable.
Frequently asked questions about the Antigravity extension in VS Code
What is the Antigravity extension for VS Code?
It is the official extension that brings Google's agentic features into VS Code, with an agent panel, diffs and multi step tasks.
How to install the Antigravity extension in VS Code?
Open the Extensions tab, search for Google Antigravity, confirm the publisher is Google and click Install. The Marketplace identifier is Google.google-antigravity.
What command installs the Antigravity extension?
Use `code --install-extension Google.google-antigravity` in the VS Code or system terminal, then confirm the Antigravity icon in the Activity Bar.
What are the prerequisites for the Antigravity extension?
Current documentation lists VS Code and an account with Antigravity entitlement; it also mentions Gemini Enterprise among the access requirements. Confirm your account eligibility.
What is the difference between the extension, the IDE and the CLI of Antigravity?
The extension, Antigravity IDE and Antigravity CLI are different paths. The extension runs inside VS Code, the IDE is a standalone environment and the CLI is used in the terminal.
Install first, automate later
Correct installation starts at the official Marketplace, goes through account confirmation, and ends with a small test in a controlled workspace. The extension, IDE and CLI are different paths, so follow the documentation for each one.
Once the first flow is predictable, increase scope gradually. That way you gain speed without losing visibility over context, permissions, diffs and tests.
Source: Google Antigravity
Tags:#Antigravity#VS Code#extensão#agentes de IA#dicas
Developer and creator of bridgecode, an agentic development environment for orchestrating squads of AI agents. Helps people going from vibe coding to professional development move from idea to shipped product.
Related articles
Dicas
How to choose an AI extension for VS Code
Learn how to choose an AI extension for VS Code, check permissions, and test agents in a controlled project.
7 min
Dicas
How to test AI agents in cloud operations with CloudOpsBench
CloudOpsBench releases 45 cloud operation tasks to test your AI agent. See how to clone, validate and run against an emulator or real AWS.
6 min
Dicas
How to migrate Agents SDK v0.33.0 to Pi 1.5
Agents SDK v0.33.0 updates PiHarness to Pi 1.5. See the changed APIs, rollback risks, and a validation roadmap.
6 min